To get started with connecting your own dedicated email domain, open up the email services settings which can be found under settings -> email services.
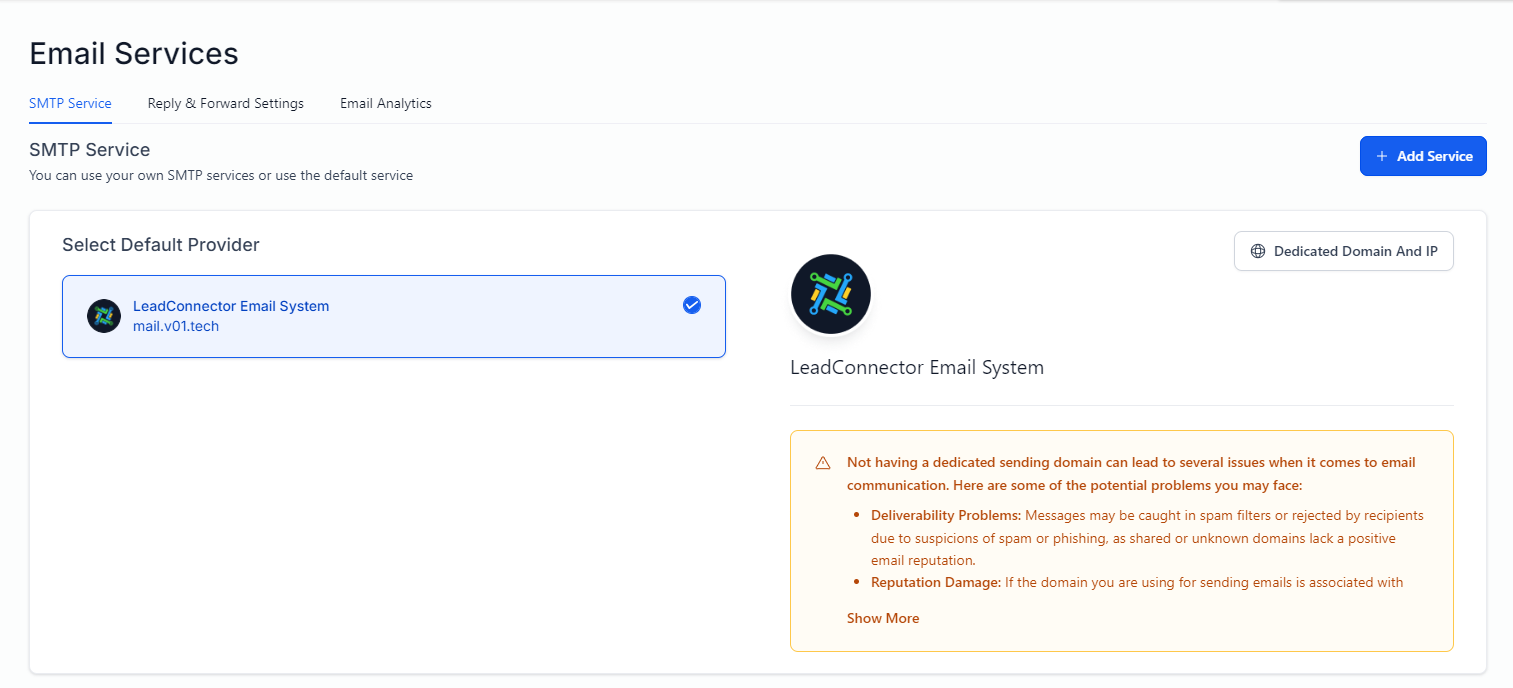
Next, select the "Dedicated Domain And IP" button in the top right. This will take you to the dedicated sending domain panel as seen in the image below.
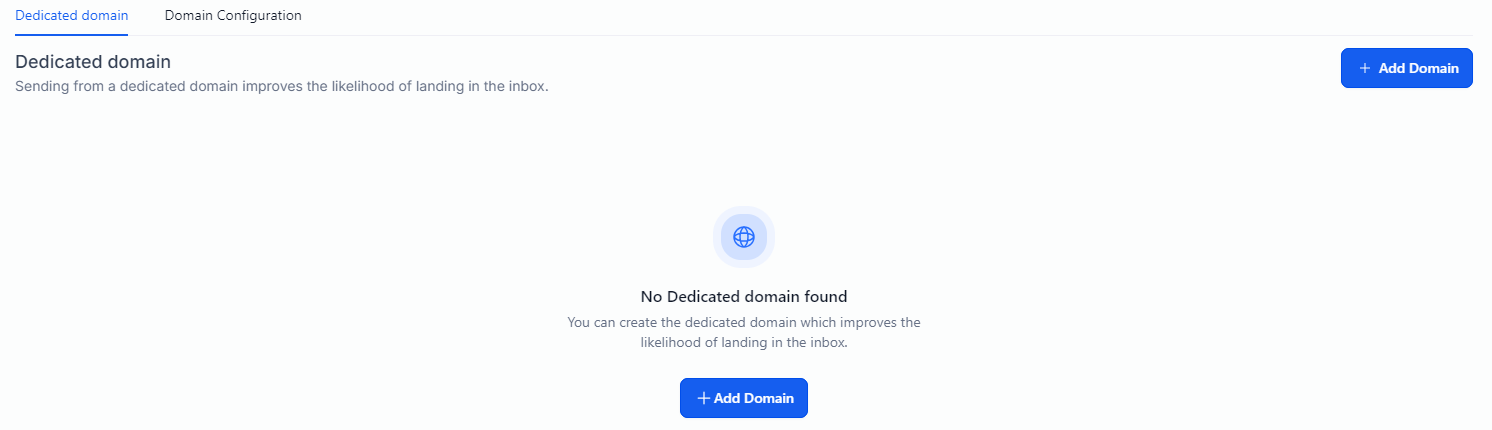
Finally, click the "Add Domain" button to begin adding your dedicated sending domain.
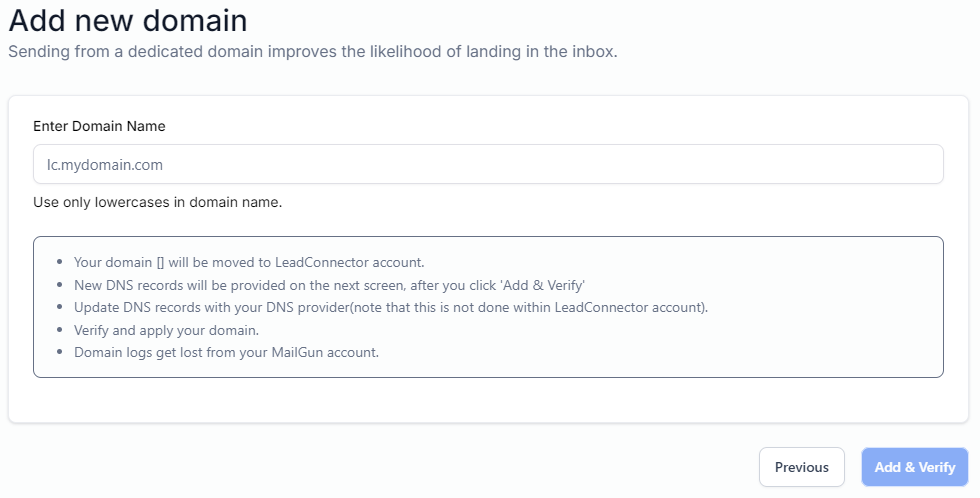
We recommend using as subdomain as the dedicated domain, for example "mail.yourdomain.com" ("mail" being the subdomain in this example). Using a subdomain will allow you to send emails via the main domain without risking burning the main domain when sending out blasts.
Once you have added your subdomain, Add and Verify the new sending domain, the platform will then automatically scan your DNS records and offer to automagically apply the records for you. Just follow the steps to authorize the domain changes and apply the new records.

Once the records have been applied, select the "Verify Domain" button.

With the new records applied, the system will automatically generated the required SSL certificate for the new sending domain. If this does not happen automatically, you can click the "Verify Now" text to force generate it. Keep in mind that DNS records can take up to 48h to fully propagate and be applied globally.
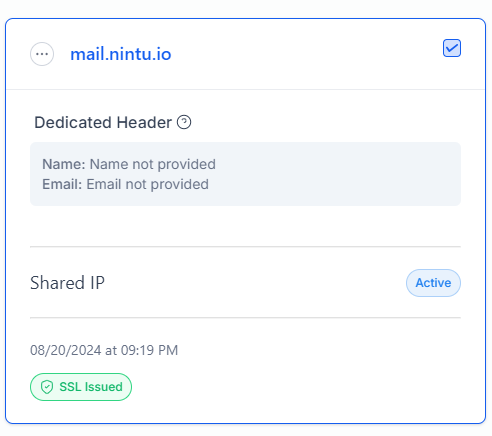
Once the verification is complete, you will see a green "SSL Issued" tag on the newly added domain.
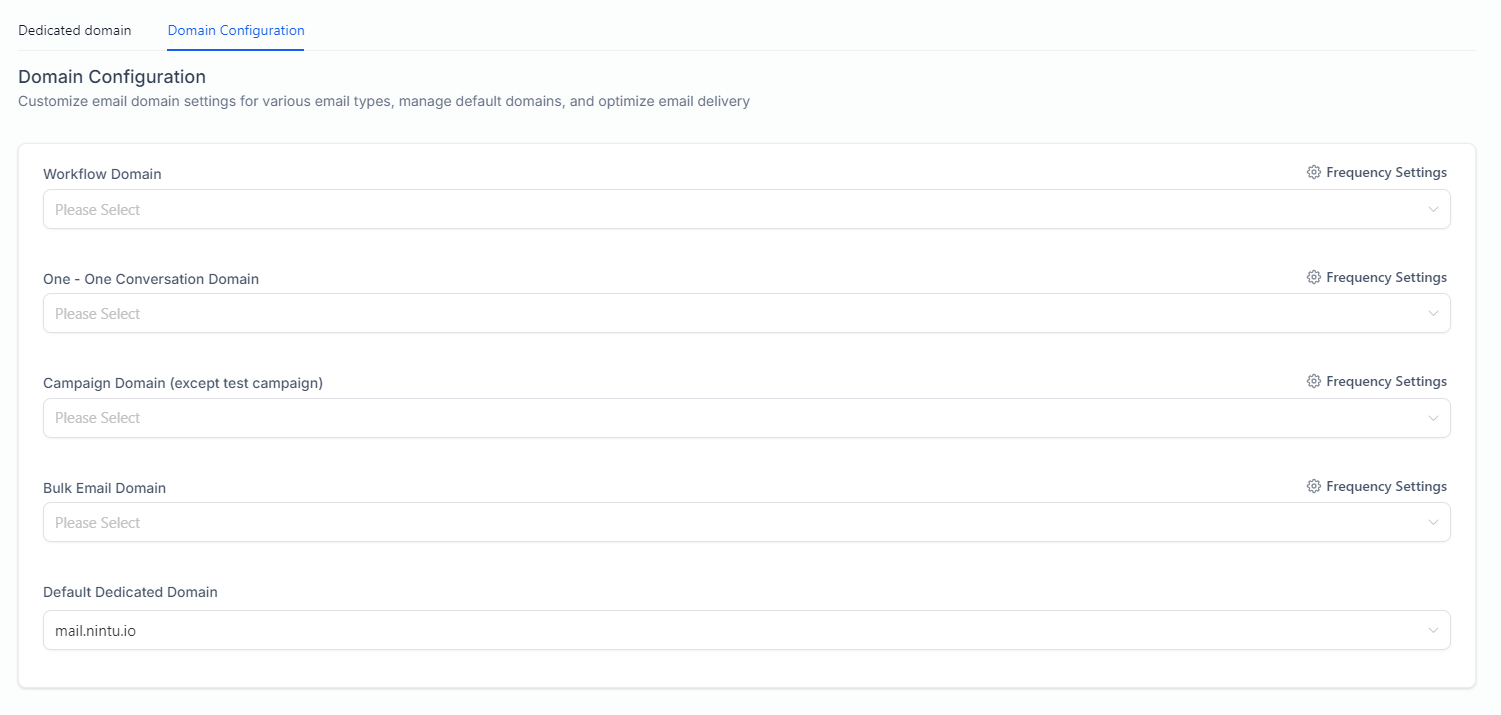
v01 supports multiple sending domains, should you wish to use different senders for different features of the platform. You can configure which systems use which domains from the domain configuration tab available on the same page.
That's it! You're now ready to begin sending out emails .🤘🧑🚀